


To install OptiMonk via Google Tag Manager, follow these steps:
1. Log in to your OptiMonk account.
2. On the left menu, select Insert code and click Copy.
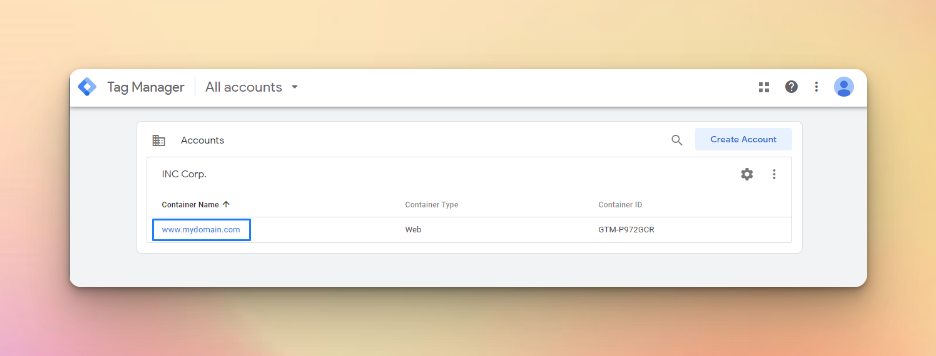
3. Log in to your Google Tag Manager account and select the website on which you want to implement OptiMonk.
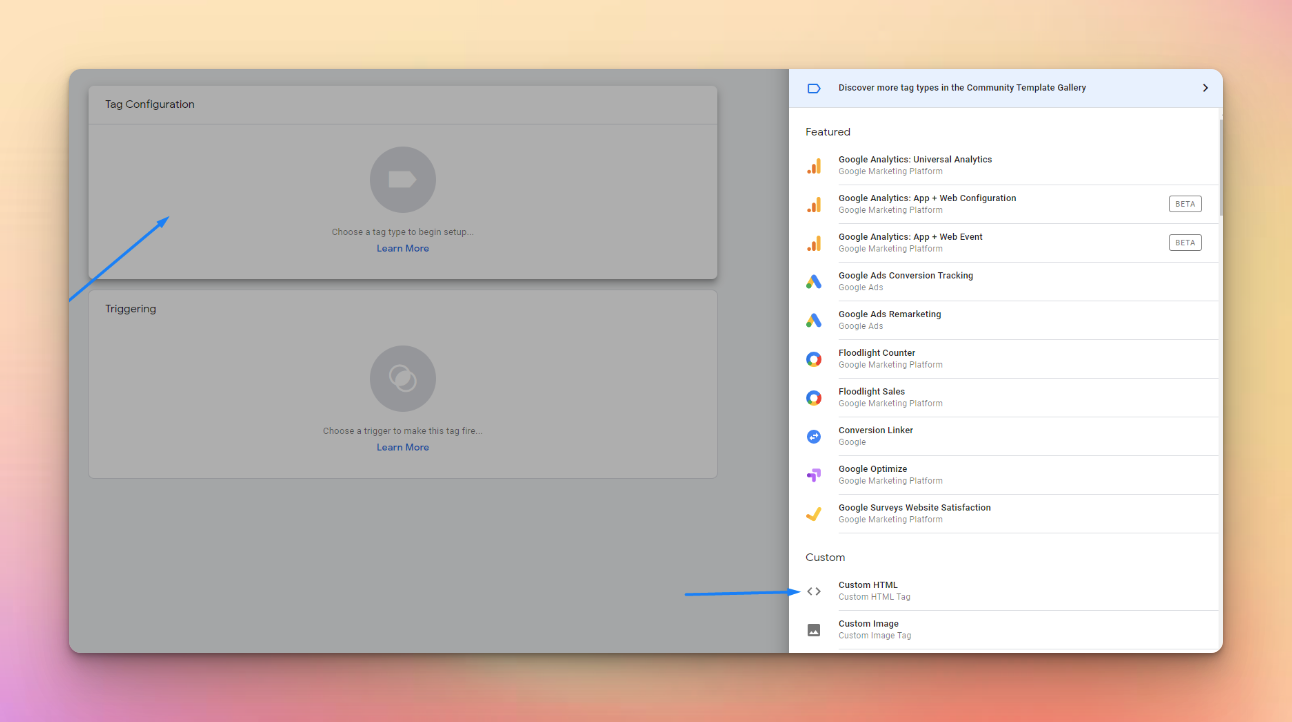
4. Click Add a new Tag on the Overview of GTM.
5. Under Tag Configuration, select Custom HTML.
6. Paste the OptiMonk code you copied earlier into the HTML box.
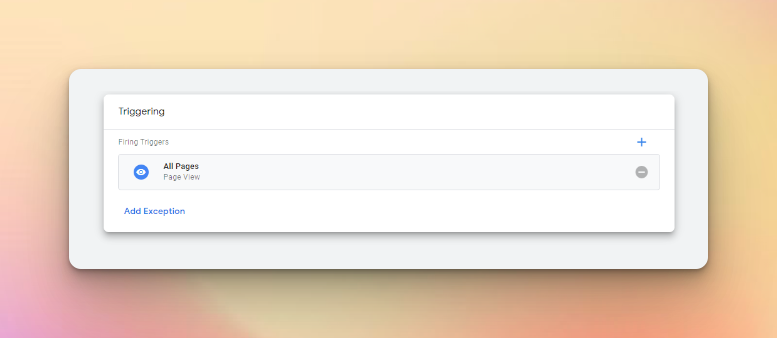
7. Click on Triggering and select All Pages. Make sure the box is ticked, then click Add on the right.
8. When you are done, click Save in the top left corner.
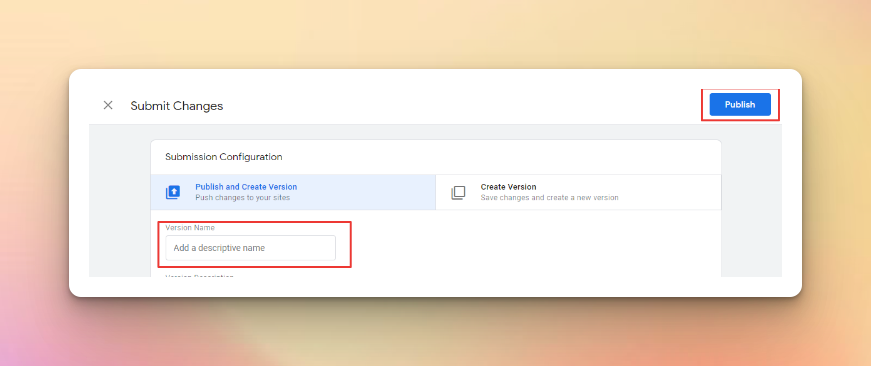
9. Click Submit to finish the setup.
10. Give a name to the changes and click Publish in the top right corner.
To check if the OptiMonk code has been implemented on your website, open your website in Google Chrome, press F12, select Console view, click in the white text box, and type "OptiMonk."
If you see results for OptiMonk, the integration was successful.
