To begin the straightforward process of Popupsmart and Sendloop integration:
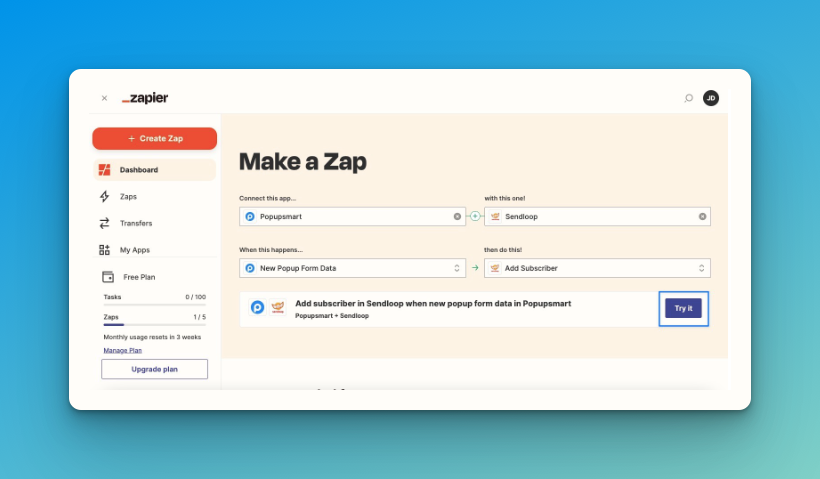
1. Log in to your Zapier account and click on the "Make a Zap" section on the dashboard. Fill in the necessary information for your desired integration.
2. Select Popupsmart as the trigger app and Sendloop as the action app. Then, choose "New Popup Form Data" as the trigger and "Add or Remove Subscribers" as the action.

3. Click "Try it" once you have completed these steps.
4. Click "Get started" to proceed.
5. In your Popupsmart dashboard, create a new campaign. Name the connection and choose the website you want to use. Click "Save."
6. Design and customize your popup as desired. Click "Settings" when you are finished.
7. Click "Add integration" on the settings page and select Zapier from the list.
8. Copy the API key and paste it into the connection page on Zapier.
9. Click "Yes, Continue." If you have previously integrated your Popupsmart account, you will not need to connect it again and can simply select your account from the list.
10. Choose the campaign you just created and obtain the API key for integration. Click "Next."
11. Connect your Sendloop account by clicking "Connect" on the Zapier page.
12. In your Sendloop dashboard, click "Settings" from the profile dropdown menu. Select "API Settings" to access the API.
13. Copy the generated API key or create a new one for your integrations.
14. Paste the API key into the designated field on Zapier.
15. Choose the desired list from your Sendloop account and click "Next."
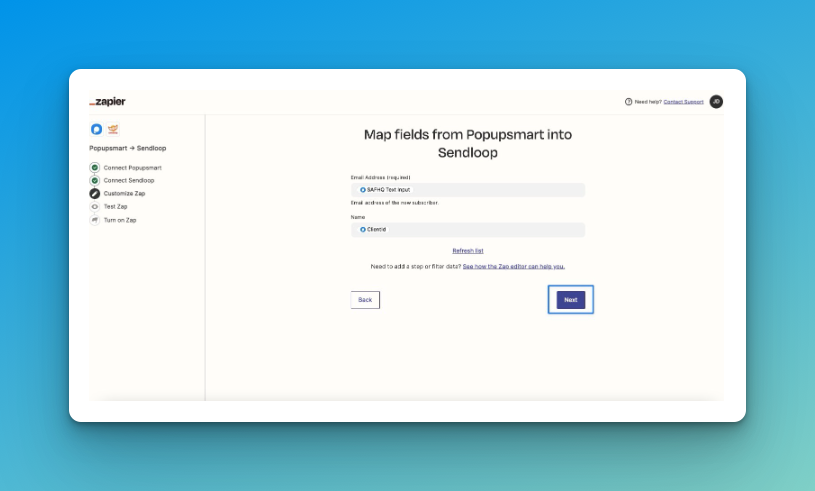
16. Map the fields as desired from the available options.

17. Test the Zap by sending a test and verifying the action.
18. If the test is successful, click "Next."
19. Turn on the Zap and click "Turn on Zap." You can edit the actions as desired using the "Edit" buttons.
20. Your Sendloop and Popupsmart integration is now ready to go! You can track the data collected through Sendloop's "Subscribers" page and Popupsmart's "Leads" section in the dashboard.


