


Optimizing your images for your OptinMonster campaigns can play a helpful role in boosting your campaigns.
It can assist you in increasing your conversion rates and helping you engage with your audience primarily.
✨ However, you need to make your campaign stand out by maintaining fast loading times and a smooth user experience for your visitors.
Adding an image to your OptinMonster campaign is a breeze with the ability to customize its design. 💨
This documentation provides a step-by-step guide on how to incorporate an image into any OptinMonster campaign.
↔️ Before you begin, it's essential to keep the following points in mind:
- 🎞️ OptinMonster allows you to upload your own images or choose from the vast collection of Unsplash stock images.
- 📸 When using your own images, they are automatically optimized for web usage upon uploading to OptinMonster.
- 🖌️ For optimal results, resize the image to match the dimensions it will appear within your campaign's unique design before uploading. As campaigns can be fully customized, there are no predefined image size recommendations.
- 👁️ If you're optimizing your campaigns for Retina displays, the image dimensions should be twice the display dimensions. For instance, if the image is displayed at 100 x 100 pixels, the image file dimensions should be 200 x 200 pixels.
🏞 Add Image Block
To add an image block to your campaign, follow these steps:
- From the Design section of OptinMonster's campaign builder, drag and drop an Image block to the desired location within your campaign design.
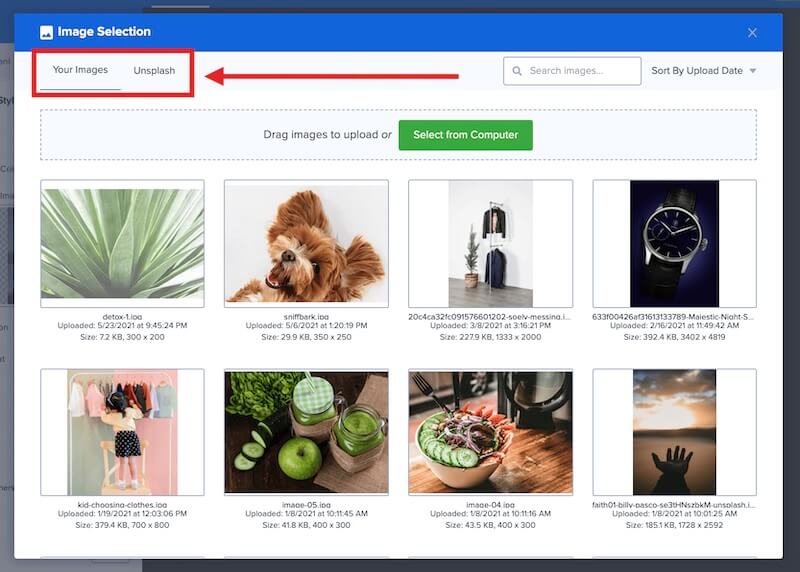
- The Image Selection window will open, allowing you to upload your own image or choose from previously uploaded images or Unsplash stock images. 🖼️
That's how it's super easy and you can shape your campaigns with lots of image selection options.
🏙️ Upload Custom Image
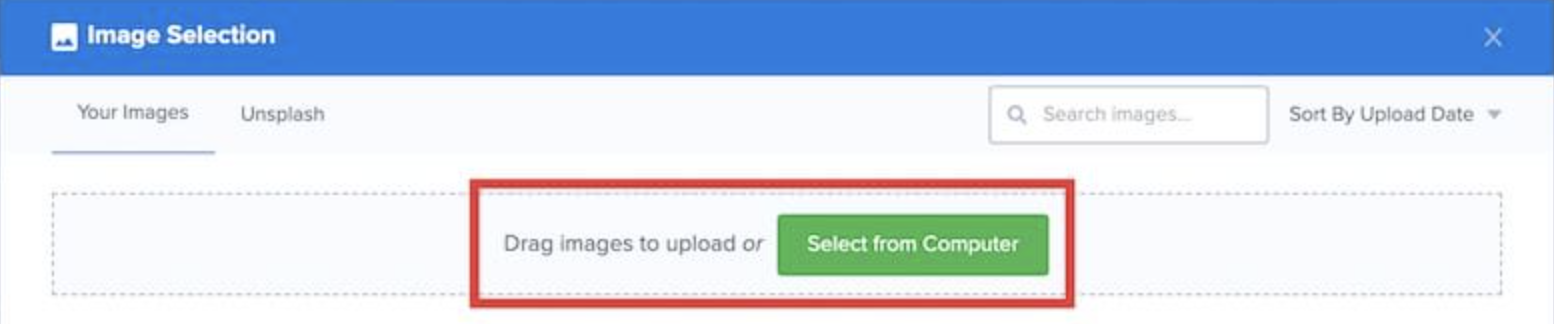
To upload your own image:
- Within the Image Selection window, elevate your image game by confidently clicking on the distinguished "Select from Computer" button.
This grants you the power to seamlessly upload an image from your personal computer, allowing you to curate a visual masterpiece that will captivate your audience.
2. Alternatively, unleash your creative prowess and tap into the previously uploaded images. As you hover over each image, click the 🟢 green (+) icon, selecting the image that speaks to your brand's vision.
Once the image is added, you can configure and customize various design settings for the image block in the sidebar panel.
Make the necessary adjustments and save the campaign when you're satisfied.
🎑 Replace Image
To replace an existing image within an image block, follow these steps:
- Enter the Design view of the campaign builder, and with purposeful precision, select the image block that requires your expert touch.
- Direct your attention to the image icon nestled within the sidebar panel. You will see the Image Selection window before you.
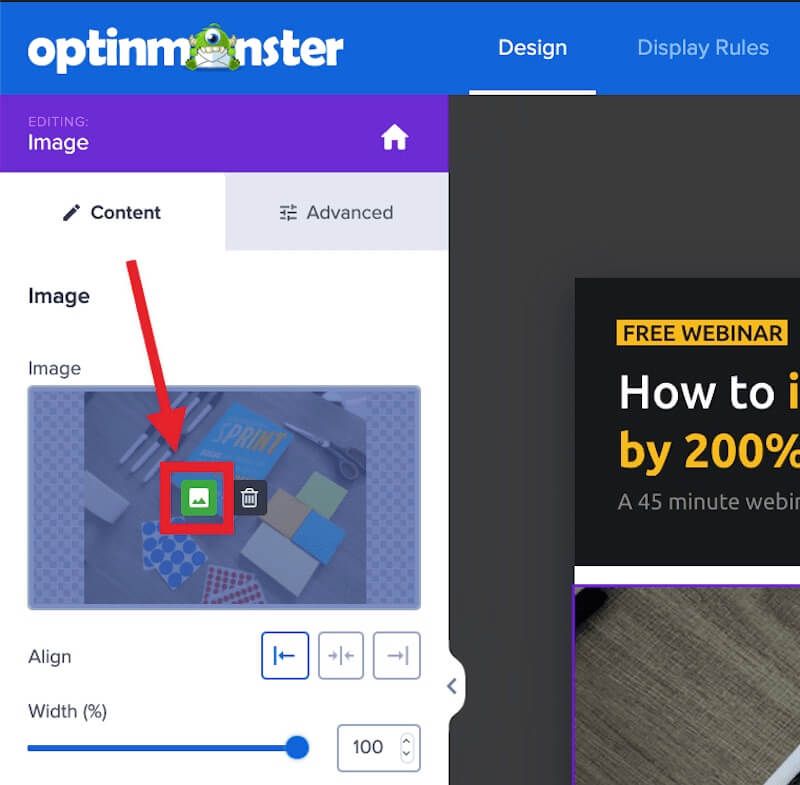
3. Deliberate between adding a meticulously curated image of your own or selecting an exquisite Unsplash stock image to supplant the existing one.
4. After finalizing your selection, simply save the campaign. 😉
The process of replacing images is similar to adding an image for the first time. They both are quick to handle and beautify your campaigns.
🗾 Add Link to Image
To make your image block clickable, allowing it to function as a link, follow these steps:
- Navigate to the Design view of the campaign builder and specifically select the image block you intend to modify.
- Identify the Link field situated in the sidebar panel, and input the desired URL that corresponds to your intended destination.
- For additional customization possibilities, access the gear icon positioned right next to the Link field. ❗️
- Once you have finalized your modifications, ensure to save the campaign to preserve the changes.
🔗 By meticulously following these instructions, employing varied vocabulary and an intentional approach, you can seamlessly empower your OptinMonster image block to operate as a captivating link.
This will enhance user interaction and contribute to an engaging and immersive experience.
👋🏻 Now, it's time to get back to OptinMonster and try customizing the images on your campaigns!
🚀 OptinMonster VS Adoric Comparison
🚀 OptinMonster VS Hello Bar Comparison
🚀 OptinMonster VS Privy Comparison
Extra Tips & Troubleshooting Corner
Extra Tips:
- Use high-quality images: Ensure that the images you use in your campaign are of high resolution and clarity. Blurry or pixelated images can negatively impact the user experience and make your campaign appear unprofessional.
- Compress your images: Large image file sizes can slow down your campaign's loading time. Optimize your images by compressing them without sacrificing too much quality. There are various online tools available, such as TinyPNG and JPEGmini, that can help you reduce the file size of your images.
- Choose the right file format: Depending on the type of image, you can select an appropriate file format. JPEG is suitable for photographs and complex images, while PNG is ideal for graphics, logos, and images with transparency. Using the correct format can help maintain image quality and reduce file size.
- Optimize alt tags: Alt tags (alternative text) provide descriptions of images for visually impaired users and search engines. Use relevant keywords in your alt tags to improve accessibility and optimize your campaign for SEO.
- Test image placement: Experiment with different image placements within your campaign to determine what works best for your audience. Try placing images at the top, middle, or bottom of your campaign to see which position generates the highest engagement and conversions.
Troubleshooting:
- Image not displaying: If your image is not showing up in your OptinMonster campaign, double-check the image URL or file path. Make sure the image is hosted on a reliable server and the URL is correctly entered in your campaign settings.
- Slow loading time: If your campaign images are taking too long to load, consider optimizing their file sizes. Compress the images or reduce their dimensions to improve loading speed. Additionally, make sure you have a fast and reliable hosting provider.
- Image alignment issues: If your image appears misaligned or doesn't fit properly within the campaign, review the settings for image width and height. Adjust these dimensions to ensure the image fits within the designated space and maintains its aspect ratio.
- Mobile responsiveness: Check if your campaign images are displaying correctly on mobile devices. OptinMonster offers responsive design options, so ensure your images are appropriately scaled and positioned for optimal viewing on smartphones and tablets.
- Cross-browser compatibility: Test your campaign images across different web browsers (e.g., Chrome, Firefox, Safari) to ensure they appear consistently across all platforms. Make adjustments if any compatibility issues arise.
Optimizing your campaign images can enhance user engagement and improve the effectiveness of your campaigns. Regularly monitor and analyze the performance of your campaigns to make data-driven decisions for further optimization.
FAQs Related to Optimizing Campaign Images on OptinMonster
My campaign images are not displaying. What could be the issue?
If your campaign images are not showing up, there could be several reasons:
- Check the image URL or file path to ensure it is correct and accessible.
- Make sure the image is hosted on a reliable server and hasn't been removed.
- Verify that you have enabled the option to display images in your OptinMonster campaign settings.
Can I use animated GIFs in my OptinMonster campaigns?
Yes, you can use animated GIFs in your campaigns. However, keep in mind that large GIF files can impact loading times. Optimize your GIFs by reducing the number of frames or limiting their size to ensure optimal performance.
How do I add alt tags to my campaign images in OptinMonster?
In OptinMonster, you can add alt tags to your campaign images by following these steps:
- Select the image element in your campaign.
- In the editing panel on the left, scroll down to the "Image Settings" section.
- Locate the "Alt Text" field and enter the relevant description or keywords for the image.
Are there any recommended file formats for campaign images in OptinMonster?
OptinMonster supports various image file formats, including JPEG, PNG, and GIF. Choose the format based on the type of image and its requirements. For photographs, JPEG is usually suitable, while PNG is ideal for graphics and images with transparency.
Is it possible to add multiple images to a single campaign in OptinMonster?
Yes, you can add multiple images to a single campaign in OptinMonster. Use the image element and duplicate it as needed to insert additional images into your campaign.
Are there any restrictions on the file size of campaign images in OptinMonster?
OptinMonster doesn't impose specific file size restrictions for images. However, keep in mind that larger file sizes can slow down your campaign's loading time. It's best to optimize your images and aim for reasonable file sizes to ensure optimal performance.
Can I link my campaign images to external URLs?
Yes, you can link your campaign images to external URLs. OptinMonster allows you to add links to your images, enabling users to click on the image and be redirected to the designated URL.
Is it possible to add multiple images to a single campaign in OptinMonster?
Yes, you can add multiple images to a single campaign in OptinMonster. Use the image element and duplicate it as needed to insert additional images into your campaign.
